Last updated on April 22nd, 2026 at 10:38 am
 Here's something that surprises many engineers: a welded assembly can be more accurate than a single formed part.
It might sound backwards at first. Forming keeps everything as a single continuous piece with no joints and no assembly variation, while welding adds seams, heat, and the potential for distortion. So how could welding possibly be more precise?
The answer comes down to how tolerances behave across multiple bends. Every bend introduces a small variation in angle and position, and on a simple bracket with two bends, that variation is negligible. But on a complex enclosure with a dozen bends, those small errors start stacking. By the time you reach the last feature, you might be significantly off from where the print says you should be.
A welded assembly sidesteps that problem. Instead of fighting cumulative error across many bends, you form simple, accurate subcomponents with only a bend or two each, then fixture and weld them together while precisely controlling the final critical dimensions.
None of this means forming is the wrong choice. When geometry is straightforward, a single formed part is usually faster, cheaper, and stronger. But the “obvious” answer isn’t always the right one, and at Approved Sheet Metal, we see daily that the best fabrication approach depends entirely on what the part actually needs.
Table of Contents
How ASM Evaluates a New Design Concept
Every part that comes through our shop goes through the same basic evaluation. We're trying to answer a simple question: what's the best way to make this?
The answer usually comes down to three things:
Step 1: Can We Form This Without Overstressing the Material?
The first thing we look at is whether the part can physically be formed without pushing the material beyond its limits. Sheet metal is forgiving up to a point, but certain geometries start raising red flags immediately. Very deep flanges, tight return bends, large offsets, and shapes that would trap the tooling mid-process are all signs that forming might not go smoothly.
We're also looking at material thickness relative to bend radius. Thicker material needs a larger radius to bend without cracking, and it also takes significantly more force to form. When a design calls for tight bends in thick material, or deep returns close to the bend line, we start thinking hard about whether this part will wrinkle, crack, or twist during forming. If the flat pattern can't move cleanly through the tooling from start to finish, forming stops being a reliable option.
Step 2: How Will Tolerances Behave Across Multiple Bends?
Every bend introduces a small variation in angle and position. Those variations are minor on their own, but they accumulate. A part with two or three bends can hold tight tolerances without much trouble, but a part with eight or ten bends, especially a long one, may drift significantly by the time you reach the final feature.
When the finished assembly requires tight fits across multiple bends, we have to ask whether a single formed part can realistically hold those dimensions. Sometimes the honest answer is no, and a welded assembly built from simpler subcomponents will actually match the print more reliably.
Step 3: What's the Most Manufacturable, Cost-Effective Path?
A single formed part sounds like the cheaper option because there's no welding labor involved. But that's only true if the part forms cleanly without special tooling, multiple setups, or high scrap risk.
When forming requires custom dies, oversized equipment, or staged bending operations to avoid cracking, the cost advantage disappears quickly. In those situations, splitting the geometry into two or three simple shapes and welding them together is often faster, more predictable, and less expensive overall.
There's also a middle path that works well for certain parts: form as much as possible, then weld on only the features that can't be bent. At Approved Sheet Metal, we're always balancing strength, tolerance, repeatability, and cost to find the approach that makes the most sense for each specific design.
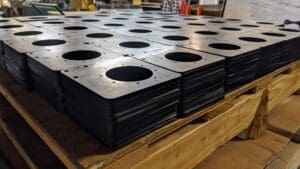
Advantages of a Single Formed Part
There's a reason designers default toward single-piece formed parts when they can. Forming is efficient, the results are consistent, and when the geometry works, the finished product is often stronger and better looking than a welded assembly.
Structural and Performance Advantages
The strength of a formed part comes from what it doesn't have: welds. Every weld creates a heat-affected zone where the base material's properties change, and every seam is a potential failure point under stress. A single formed part avoids this problem entirely.
The material's grain flows continuously through each bend, making formed corners inherently strong. There's no joint to crack, no seam to fatigue, and no localized soft spot where the heat from welding changed the metal's structure.
That's why formed parts tend to perform better under vibration and cyclic loading. Brackets, enclosures, guards, and channels that see repeated stress over time hold up well as single-piece shells because there are no welded seams that can become weak points.
Operations and Cost Advantages
Fewer operations mean less time and less cost. A single formed part follows a simple sequence: cut the blank, bend it, deburr the edges, and send it to finishing.
That efficiency compounds across a production run. Once the press brake is dialed in, parts come off consistently. There's less handling, less opportunity for variation, and less labor tied up in secondary processes.
For straightforward geometries and small-to-medium runs, forming is almost always the more economical path. The parts move through the shop faster, and the cost per piece stays low because you're not paying for unnecessary work.
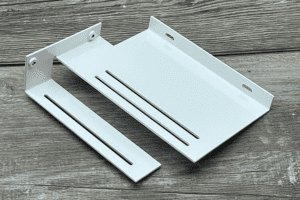
Cosmetic Advantages
What you see on a formed part is what you get. There are no weld seams to blend out, no grind marks to hide, and no heat discoloration to deal with. The surface comes off the brake clean and uniform.
That's a significant advantage for parts where appearance matters. Stainless steel and aluminum show every flaw, so any inconsistency in texture or color stands out. A formed part avoids those issues because there's no secondary work disrupting the surface.
Advantages of a Welded Assembly
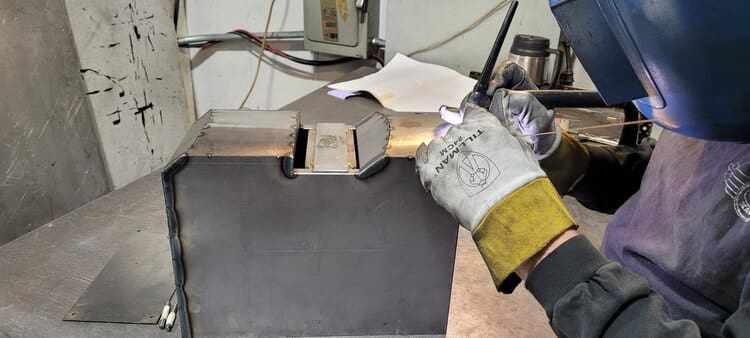 Where forming keeps everything in one piece, a welded assembly goes the other direction: splitting the geometry into simpler shapes that form cleanly and then joining them into the final part. When a design gets deep, tight, or complex, that approach often delivers better accuracy, less scrap, and more control than trying to force everything through the brake as a single blank.
Geometry Flexibility
Some shapes simply aren’t practical to form as a single piece, such as deep boxes with tight corners, flanges that return back toward themselves, or complex offsets that would trap the tooling mid-bend. These geometries might look fine in CAD, but the press brake can't produce them without the material cracking, wrinkling, or getting physically stuck.
A welded assembly removes those constraints. Instead of forcing the entire geometry through a single forming sequence, you break the part into simpler shapes that bend easily and accurately on their own. Then you weld them into a final form that would have been impossible to achieve efficiently any other way.
In many cases, it's the most practical way to get what you actually need, and when it's done correctly, the result can be just as strong and precise as a formed part.
Better Tolerance Control on Complex Parts
We covered tolerance stacking earlier, but it's worth emphasizing what this means in practice. Each individual bend can pass inspection on its own, but by the final feature you might be holding a part that met every spec and still won't fit the assembly.
Welding solves this by letting you set critical dimensions during assembly. Instead of relying on a long bend sequence to land perfectly, you fixture accurate subcomponents in position and lock them in place.
Scalability and Repair
Welded assemblies are more forgiving when something goes wrong. If a single tab is out of spec or gets damaged, you can rework or replace that piece without scrapping the entire part. A formed shell doesn't offer that flexibility—one bad bend or one damaged feature means starting over from a fresh blank.
There's also a practical advantage when working with thick materials or large structures. Forming heavy plate requires oversized equipment, higher tonnage, and sometimes staged bending operations to avoid cracking. Breaking the design into smaller welded sections lets you work within the capacity of standard equipment while still hitting the final size and shape you need.
How Part Complexity and Size Drive the Decision
When we're reviewing a new design, we're not just asking what the part is supposed to do—we're also asking what the geometry is trying to tell us. A simple channel or bracket with a few generous bends is almost always happier as a formed part. But as you start adding deep boxes, tight returns, and long chains of bends, the design begins to behave more like a weldment.
Complexity and size don't make forming impossible, but they do change the odds. The more a part pushes material and tooling to their limits, the more seriously we have to consider breaking it into a welded assembly rather than forcing it through the brake as one piece.
Good Candidates for Forming
Parts that form well tend to share a few characteristics:
- Open, straightforward geometry like channels, brackets, shallow boxes, or simple enclosures
- A flat pattern that moves through the brake without running into itself or trapping tooling
- Bend radii comfortably within what the material can handle
- Enough flange clearance for the punch to enter and exit cleanly
- A logical bend sequence that doesn't require awkward repositioning or special setups
When a part checks most of these boxes, keeping everything as a single formed piece usually makes sense.
Red Flags That Point Toward Welding
Other geometries raise concerns early:
- Deep returns close to bend lines, leaving little room for tooling to work
- Tight offsets clustered in a small area, making bend sequencing difficult
- Closed shapes that wrap back on themselves and risk trapping the part mid-process
- Very long parts with many bends where tolerance errors can compound
- Designs that would require special tooling, oversized equipment, or multiple complex setups
When a design combines several of these characteristics, the risk of scrap and rework climbs quickly. That's usually the point where a welded assembly becomes the more practical option.
Size, Thickness, and Material Considerations
Thick materials and large parts add another layer of complexity. As material thickness increases, so does the required bend radius and the tonnage needed to form it. Heavy plate may require oversized equipment, staged bends to avoid cracking, or multiple setups that introduce opportunities for twist and springback.
In those situations, breaking a large part into smaller welded sections is often the smarter path. Each piece stays within the range of standard equipment, the forming operations are more controlled, and the final assembly can still achieve the size and shape the design calls for.
Material choice plays into this, too. Softer alloys like aluminum usually tolerate tighter bend radii and form with less springback, while high-strength steels and stainless steel are more prone to cracking, surface marking, and unpredictable springback when you push the geometry. A design that works fine in thin aluminum might need to be rethought—or broken into a welded assembly—when you switch it to thicker stainless.
At a Glance: Forming vs. Welding
| Factor | Favors Forming | Favors Welding |
|---|---|---|
| Geometry | Open shapes: channels, brackets, shallow boxes | Deep boxes, tight returns, closed shapes |
| Bend sequence | Simple, logical progression | Complex sequencing, trapped tooling risk |
| Tolerances | Few bends, short tolerance chain | Many bends, cumulative error risk |
| Material thickness | Thin to moderate, standard radii | Thick plate requiring high tonnage |
| Equipment | Standard tooling, minimal setups | Would require oversized or specialty equipment |
Making Welded Parts Look Good
Welding leaves marks that may include heat discoloration, texture changes at the seams, and beads that need to be ground down. On bare stainless steel or aluminum, those differences are apparent, and blending them out completely takes skilled labor and adds cost.
But not every part stays bare. If the design calls for powder coating, most of those cosmetic concerns disappear because the coating unifies the surface and hides what's underneath. So a welded assembly that would look rough in raw metal can come out perfectly clean once it's coated.
When you're weighing forming against welding and appearance is part of the conversation, the real question is what finish the part ends up with. A welded part heading to the powder coat line doesn't need the same level of finish work as one that has to look good in bare metal.
Getting It Right the First Time
There's no universal answer to whether a part should be formed or welded. The right approach depends on geometry, material, tolerances, and finish—but the goal is always the same: a repeatable, accurate part that doesn't fight the process at every step.
The easiest way to get there is to ask the question early. If your design has deep flanges, tight returns, thick material, or tolerances that stack across multiple bends, it's worth a conversation before the drawing is finalized, as getting it wrong in either direction is expensive. A forced forming operation can lead to cracked corners, wrinkling, and high scrap. An over-engineered weldment means paying for labor that didn't need to happen.
At Approved Sheet Metal, we'd rather catch these issues in the design phase than troubleshoot them after production is underway. If you're not sure which direction makes sense for your next part, send it over. We'll take a look and help you find the path that actually works.