Last updated on July 14th, 2025 at 09:38 am
Some of the most common issues we’ve encountered during our 15+ years of experience assembling sheet metal parts occur during hardware insertion.
If we’re getting ready to assemble your custom sheet metal parts and suddenly find that the hardware doesn’t fit properly due to discrepancies in hole size or material thickness, it can slow the whole process way down. We have a rigorous quality inspection in place to catch these issues, but having to backtrack at any point during the assembly process can really affect lead times.
The best way to avoid bottlenecks during hardware insertion is to include accurate hardware hole sizes and compatible material thicknesses in your initial custom metal fabrication drawings.
Table of Contents
- 1 Hardware Hole Size
- 2 Sheet Metal Hardware Hole Sizes Chart
- 3 Engineering Guidelines for Hardware Compatibility
- 4 Material Thickness
- 5 Sheet Metal Hardware Hole Size FAQ
- 5.0.1 Why is hardware hole size crucial in sheet metal fabrication?
- 5.0.2 What happens if the hardware hole size in my drawings is incorrect?
- 5.0.3 How can I ensure smooth hardware insertion in my custom sheet metal parts?
- 5.0.4 Why is material thickness important in hardware insertion?
- 5.0.5 What recommendations do you have for hole sizes in thin and thick sheet metal?
Hardware Hole Size
Did you know that hardware hole sizes are the number one thing sheet metal fabricators have to fix before sending a part to the floor?
When we receive drawings with incorrect hardware hole sizes, one of two problems typically occurs—and each one can drastically slow down lead times:
The hole is too small. If the hardware hole size indicated is smaller than the hardware you’re working with, we can, and will, fix this problem for you. The solve is fairly simple: we take the time to manually drill the hole a bit bigger to accommodate your hardware. But adding in an unexpected manual operation does take more time.
The hole is too big. If the hardware hole size indicated is bigger than the hardware you’re working with, we can’t add material to the hole once it’s been cut. Unfortunately, in this case we have no choice but to scrap the part entirely and start over. Scrapping the part can cause delays in lead time, potentially increase costs, and isn’t great for the environment.
Our preference is to make sure we have the right information in place to make your part correctly the very first time! That way we can get your parts back to you as quickly as possible.
Approved Sheet Metal is always looking for ways to improve the customer experience, so we created a handy hardware hole sizes chart for product developers to reference when designing custom sheet metal parts. We recommend using this chart for your drawings so that we can get your hardware inserted correctly the first time.
Sheet Metal Hardware Hole Sizes Chart
CHART DOWNLOAD
Hardware hole sizes are the number one thing sheet metal fabricators have to fix before sending a part to the floor. So we have created a referenceable chart for product developers that are designing sheet metal parts. Use this chart to find the correct hole size for the hardware you select.

Engineering Guidelines for Hardware Compatibility
To ensure your custom sheet metal parts are ready for fast and reliable assembly, it’s essential to design hardware features that align with your part’s material, thickness, and intended hardware type. At Approved Sheet Metal, we see firsthand how minor mismatches between fasteners and sheet metal geometry can delay projects, increase costs, or result in scrapped parts.
Use the following engineering guidelines to avoid common mistakes and ensure hardware compatibility from the start.
1. Choose the Right Hardware for the Material Type & Thickness
Not all hardware works with every material or gauge. Be sure to review the manufacturer’s specifications for minimum sheet thickness and material compatibility. For example:
- Stainless PEM® hardware may not seat properly in aluminum without over-compression.
- Zinc-plated fasteners may corrode in wet environments unless properly coated.
Pro tip: For thin aluminum parts under 0.050”, consider self-clinching standoffs designed for low-strength materials.
2. Use Manufacturer-Specified Hole Sizes
Each hardware type requires a specific hole size and tolerance range. Even a few thousandths of an inch off can cause:
- Too-small holes ➜ extra labor to drill or rework
- Too-large holes ➜ unseated or failed fasteners
Always use the hole size recommended by the fastener manufacturer (e.g., PEM®, Captive Fastener, Southco). If you’re unsure, use our downloadable Hardware Hole Sizes Chart.
3. Maintain Sufficient Edge Distance & Spacing
To avoid deformation during installation or damage to surrounding features, follow these spacing guidelines:
- Edge distance: Place holes at least 2× the material thickness from the nearest edge.
- Fastener spacing: Allow a minimum clearance of 1.5× the fastener diameter between holes.
Too-close spacing can result in bulging, distortion, or stress cracking—especially in softer materials like aluminum or copper.
4. Align Hardware Length With Material Thickness
When selecting hardware with a clinch feature (like a standoff or nut), ensure the length of the post or barrel matches your sheet thickness:
- Thin material ➜ use short-post hardware to avoid collapse during insertion
- Thicker material ➜ select longer barrels for proper seating and load-bearing strength
If the post extends too far beyond the material, the hardware may not seat fully. If it's too short, the joint may lack structural integrity.
5. Ask About Pre-Insertion Design Review
When in doubt, send us your drawings or models early. Our team can review your:
- Hole sizes and tolerances
- Fastener type and material fit
- Potential clash or clearance issues
- Press compatibility for difficult-to-reach areas
We’re happy to flag any issues before parts are cut to save you time and rework costs.
Material Thickness
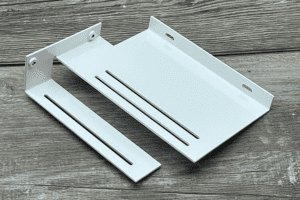
It’s also important to make sure that your material thickness is compatible with the hardware you’re inserting.
Typically if you have a piece of thin sheet metal, the length of the nub at the end of the hardware should be minimal. If too much of the nub is exposed, the pneumatic press we use to join the materials together may squish the hardware itself, preventing it from seating correctly. The result is a piece of hardware that either falls out or doesn’t fit properly with the rest of the components during assembly.
Thick sheet metal, on the other hand, benefits from having a longer nub at the end of the hardware. Thicker parts usually require a significant amount of strength to support more mass and having a longer nub can supply necessary reinforcement.
We recommend a hole size of -0” for thin parts and a hole size of -3” for really thick parts. You can refer to our hardware hole sizes chart for additional guidance.
When you’re in need of custom sheet metal assembly services, Approved Sheet Metal is here to get your parts to you fast. From enclosures and brackets to large cabinets with multi-process manufacturing, we can do it all! Give us a shot on your next project.