
 When it comes to protecting sensitive components inside a sheet metal enclosure, you might think the safest approach is to seal it up tight to keep everything out. But a sealed enclosure creates problems of its own. The components inside often generate heat, which can build up without proper ventilation. Temperature swings can also create internal condensation and pressure changes that stress the enclosure’s seals from the inside out.
The issue is that every ventilation feature you add to an enclosure does two things at once: it provides the airflow needed to protect components from heat buildup, while also creating potential entry points for contaminants that put those components at risk. Designing for both realities means understanding how much ventilation the enclosure actually needs, where to place it, and how to protect against what might come in through those openings.
Getting that balance right depends on the enclosure’s environment, internal heat load, airflow path, protection requirements, and manufacturability.
Why Ventilation and Protection Conflict
The obvious tradeoff is airflow versus exposure. The less obvious problem is that even a sealed enclosure is not a static environment.
As temperatures rise and fall, or as outside conditions change with weather or altitude, the air inside an enclosure expands and contracts. That movement can stress seals over time and turn small gaps into pathways for contamination.
Condensation creates a similar problem from the inside. Temperature swings can cause moisture to form inside the enclosure, even when outside water is being kept out. Without ventilation or drainage, that moisture has nowhere to go and can damage components as quickly as exposure from the outside.
Sealing the enclosure, in other words, does not automatically mean protecting the components. Real protection means designing for what the enclosure must manage internally and externally, not just what it must keep out.
What Goes Wrong at Each Extreme
When an enclosure is over-ventilated, it may handle heat well but offers too little protection. Too many openings, or openings that are too large, make it easier for dust, debris, and moisture to get in. Over time, that exposure can degrade the components inside. In industrial or outdoor environments, where the air may carry more particulates and weather is a factor, premature component failure becomes a real risk.
When an enclosure is over-sealed, the opposite tends to happen. Heat has nowhere to go, and components run hotter than they should. Over time, that heat can shorten component lifetimes, cause performance issues, and, in some cases, lead to complete system failure. An overly sealed enclosure can also trap condensation, causing moisture damage in an enclosure designed specifically to keep moisture out.
Both failures stem from the same mistake: solving for half of the problem without accounting for the other half. The difference between an enclosure that works and one that doesn’t starts with understanding the conditions it needs to survive.
Let the Environment Drive the Design
The environment in which an enclosure operates should shape nearly every design decision. A unit going into a clean, climate-controlled facility doesn’t need the same protection strategy as one being mounted on a rooftop or installed on a factory floor where metal dust is in the air all day.
In dusty or particulate-heavy environments, ventilation openings need to be filtered or shielded. Open perforations that work well in clean indoor settings can allow fine particles to accumulate on boards and components over time, potentially contributing to overheating, electrical issues, or premature failure.
In wet or outdoor applications, the risks shift. Rain, humidity, and water exposure are all factors, and the enclosure may need features such as drip edges, gasketing, and downward-facing louvers to help control where water can enter. Simply adding a vent to the side of an outdoor enclosure without accounting for wind-driven rain, runoff, or pooling is a common design oversight.
Temperature swings add another consideration. Outdoor enclosures often need to handle both heat and cold, sometimes on the same day. An enclosure that performs well in a mild indoor environment may behave very differently in outdoor heat, cold, or rapid temperature changes, both in terms of thermal management and the physical behavior of seals and gaskets. That range affects material selection, coating choices, and how ventilation is implemented.
The harsher the environment, the more intentional the ventilation strategy has to be. There’s no one-size-fits-all approach, which is why the environment should always be the starting point.
How Much Airflow Do You Actually Need?
While the environment tells you what the enclosure has to protect against, the internal heat load tells you how much ventilation it actually needs.
The components inside an enclosure generate heat to varying degrees. The amount of airflow the enclosure requires to maintain a safe operating temperature depends on that heat load. In many cases, this can be estimated from the power consumption and thermal output of the components inside the enclosure. From there, airflow requirements can be calculated or validated through testing.
The key is not to guess:
- Overbuilding ventilation, because it seems safer, can expose components to contaminants that wouldn’t otherwise be an issue.
- Underbuilding it because the enclosure looks like it has enough openings can leave components running hotter than they should.
Both mistakes are common and avoidable when the ventilation design is based on actual thermal needs rather than assumptions.
Four Ways to Ventilate an Enclosure
The right ventilation method depends on what the enclosure needs most: simple airflow, directional protection, particulate control, or active cooling. Here are the four most common approaches.
Perforations
Perforations are the simplest and most cost-effective option. A pattern of small openings in the enclosure allows air to pass through naturally. They work well in clean, indoor environments where dust and moisture aren't major concerns. For enclosures that don't face harsh conditions, perforations often provide enough airflow without adding complexity or cost.
Louvers
Louvers add a level of directional protection that perforations can't offer. The angled slats allow air to flow while helping to block the direct entry of water, debris, and larger contaminants. This level of protection makes them a better fit for general industrial environments or anywhere the enclosure is exposed to more demanding conditions than a clean indoor setting.
Filters
Filters are used when the enclosure needs airflow but also needs particulate control. They are common in dusty manufacturing environments, some outdoor applications, or anywhere fine contamination is a concern. The tradeoff is maintenance. Filters need to be inspected and replaced periodically, and a clogged filter can restrict airflow enough to create the same heat problems the ventilation was supposed to solve.
Fans
Fans come into play when passive airflow isn't enough to keep up with the heat load. They actively push or pull air through the enclosure, which makes them effective for high-heat applications. The tradeoff is complexity. Fans require power, mounting space, and sometimes controls. They also introduce moving parts that can wear out or fail, which means the enclosure's cooling system now has its own maintenance and reliability considerations.
The table below compares these four methods across protection level, cost, and best-fit applications.
| Method | Best For | Protection Level | Cost Impact | Notes |
|---|---|---|---|---|
| Perforations | Indoor, low contamination | Low | Low | Simple and cost-effective |
| Louvers | General industrial use | Moderate | Moderate | Adds directional protection |
| Filters | Dusty environments | High | Moderate to High | Requires maintenance |
| Fans | High heat loads | Varies | High | Active cooling, adds complexity |
Designing the Airflow Path
Choosing the right ventilation method is only part of the equation. Where you place the openings matters just as much, because air doesn’t automatically flow where you need it to just because there’s an opening in the enclosure.
For ventilation to actually cool the components inside, air needs a defined path through the enclosure. The general rule of “intake low, exhaust high” exists because warm air rises, so cooler air enters near the bottom and warm air exits near the top, creating natural movement across the components. When fans are part of the design, they should reinforce that path rather than pushing air into the enclosure without a clear exit.
Placement problems tend to show up as dead zones, with hot air collecting behind tall components, pooling in corners, or getting trapped in vertical pockets where there’s no circulation. When this occurs, components in these areas can overheat even when the rest of the enclosure appears adequately ventilated.
On paper, the design may appear to have enough openings. But in practice, the air may not be reaching the parts that need it. Thinking through the airflow path early in the design process helps avoid these issues and makes the ventilation strategy work as intended.
 How Ventilation Affects Fabrication
 How Ventilation Affects Fabrication
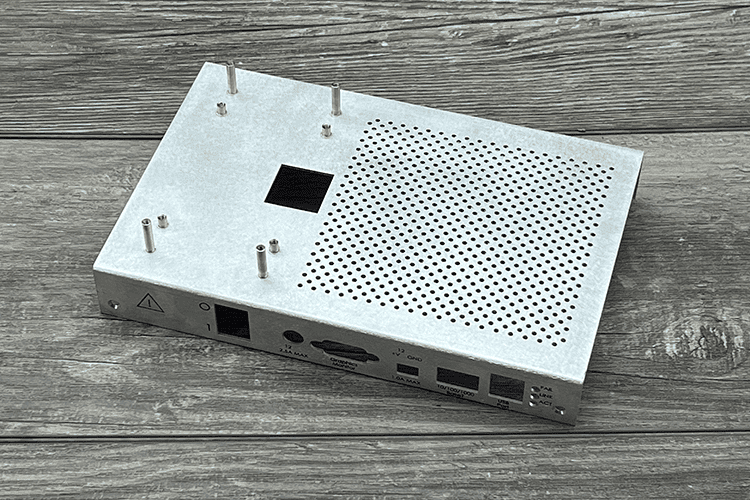
Ventilation needs should be considered early in the design process because they affect how the enclosure is built. Ventilation methods such as perforations and louvers add processing steps, such as punching and forming, which can increase costs and lead times. The more complex the ventilation strategy, the more operations are involved.
High-density perforation patterns can also weaken the enclosure if they’re not designed with structural integrity in mind. Too many holes too close together can compromise the panel's rigidity, especially in thinner materials. More complex ventilation designs may also require secondary operations, tighter tolerances, or additional hardware, such as filter housings or fan mounts.
The most efficient designs balance ventilation needs with what’s practical to fabricate. A pattern may be easy to draw in CAD, but that doesn’t always translate well to manufacturability on the shop floor.
Designing for Finishing
If the enclosure requires powder coating, that creates another consideration that’s easy to overlook. The coating adds physical thickness to the part, which can partially block small holes or tight perforation patterns. In other words, a ventilation pattern that provides adequate airflow before coating may not perform the same way after it.
Coating buildup can also affect the fit of mounted components, such as filters and fan assemblies. If mounting surfaces or hardware interfaces aren’t sized to account for the coating, features that fit in the raw design may be too tight after finishing.
Designing hole sizes, spacing, and mounting features with powder coating in mind from the start avoids rework and helps ensure the ventilation features perform as intended in the finished enclosure.
NEMA, IP, and Protection Requirements
NEMA and IP ratings define how well an enclosure protects against dust, water, and other environmental factors. These ratings can limit how ventilation is implemented, since openings can compromise the level of protection the rating requires.
A common misunderstanding is assuming that a ventilated enclosure can still meet a high protection rating without additional design consideration. In practice, achieving both airflow and a higher level of protection requires careful planning, often involving filtered or indirect airflow paths, gasketing, protected louver placement, or other design features that allow airflow without compromising the required protection level.
That means the rating should be part of the ventilation strategy from the start, not something checked after openings have already been added.
Common Mistakes in Enclosure Ventilation
Here are four of the most common enclosure ventilation mistakes we see:
- Over-ventilating without considering the environment. Adding more openings than the application requires exposes components to dust, moisture, and debris that wouldn’t otherwise reach them. An enclosure designed for a clean indoor environment doesn’t need the same ventilation strategy as one built for a dusty factory floor, outdoor location, or other demanding setting.
- Assuming more airflow is always better. Excess airflow doesn’t improve cooling beyond what’s needed for the heat load. It can add cost and increase exposure to contaminants without necessarily improving performance.
- Ignoring the airflow path. Openings only help if air moves through the enclosure in a useful way. Poor placement can leave dead zones around heat-generating components, even when the enclosure appears to have enough ventilation on paper.
- Adding ventilation late in the design process. When ventilation is bolted onto a finished design, airflow paths, fabrication impacts, finishing requirements, and protection ratings are often overlooked. The result is usually inefficient cooling, higher production costs, or a design that needs to be reworked.
Problems like these usually start when openings are added before the full enclosure strategy is clear.
Getting the Balance Right
The best enclosure designs come from thinking about ventilation and protection together from the start.
At Approved Sheet Metal, we work with engineers early in the design process to help balance thermal performance, environmental protection, and manufacturability before the design is locked in. That collaboration leads to smarter placement of ventilation features, designs that are practical to fabricate, fewer costly redesigns, and clearer expectations around cost and lead time.
A few principles worth keeping in mind on any enclosure project:
- Start with the environment and actual heat load. These two factors should drive every other decision.
- Design the airflow path, not just the openings.
- Match the ventilation method to the conditions the enclosure will face.
- Account for fabrication and finishing from the start.
- Keep it simple. Intentional designs almost always perform better and cost less than overcomplicated ones.
The right enclosure isn’t the most ventilated or the most sealed. It’s the one designed around the job it has to do.
If you're working on a sheet metal enclosure project where ventilation and protection need to work together, send us your design or request a quote to start the conversation.


