Last updated on February 4th, 2026 at 09:38 am
Have you ever noticed that standard tolerancing in precision sheet metal fabrication is not as straightforward as in precision machining?
Sheet metal tolerancing is a bit more complicated because of the fundamental differences in raw materials and manufacturing processes. Let’s take a closer look at each of these factors...
Table of Contents
- 1 Raw materials
- 2 Manufacturing processes
- 3 Sheet Metal Part Design for Manufacturing Tip
- 4 A Note on Tolerance Stack-Ups
- 5 Precision Sheet Metal Tolerance FAQ
- 5.0.1 Why is tolerancing in precision sheet metal fabrication more complex than in precision machining?
- 5.0.2 What are the variations in sheet metal thickness, and how does it affect tolerancing?
- 5.0.3 How do different manufacturing processes affect tolerances in sheet metal fabrication?
- 5.0.4 What are tolerance stack-ups, and how are they managed in precision sheet metal fabrication?
- 5.0.5 Can tighter tolerances be achieved in sheet metal fabrication, and what are the trade-offs?
Raw materials
Traditional machining projects always begin with a solid piece of material, either bar stock or round stock. In precision sheet metal fabrication, our material is supplied in sheets.
Sheet stock usually runs thinner than the stated gauge thickness. Do you know how the 2” x 4” wood planks found at your local hardware store actually measure about 1.5” x 3.5”? Sheet metal thicknesses have similar variances.
For instance, 16 gauge cold-rolled steel might have a stated thickness of 0.057,” but more often than not, the actual thickness is 0.056.” If we’re working with a tolerance of +/- 0.005” and the sheet thickness is 0.056,” we’ve already lost 30% of our allowable tolerance before we start.
Manufacturing processes
The other factor to consider is the manufacturing process used to create a specific feature. Different equipment has different tolerancing capabilities.
If features are located on the same surface, we can reliably achieve standard tolerances of +/- 0.005” because the equipment we use (typically a punch press or laser) can hold tolerances down to +/- 0.002”.
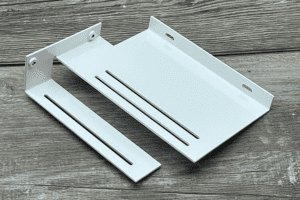
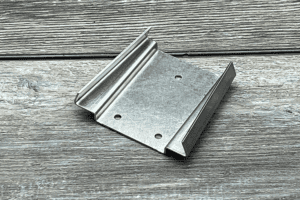
However, if we are adding formed features to the part—such as flanges—those features will need looser tolerances due to equipment constraints.
A flange is held against a back gauge at the required dimension, and a punch and die are used to create the formed feature. The punch forces the material into the die, stretching the material at the apex of the bend. This process renders the material thinner at the bend. Due to the stretching, a tolerance of +/- 0.010” bend to edge is required.
As we add more formed features to a part, we’ll also need to add more tolerance. We account for +/- 0.02” bend to bend, with a maximum allowable tolerance of +/- 0.03”—the maximum cumulative tolerance of a part with multiple formed features.
A Note on Tolerance Stack-Ups
At Approved Sheet Metal, our team has decades of experience designing and making precision sheet metal parts. We know how to accommodate for tolerances of formed features and added features.
Typically, we can anticipate and mitigate any tolerance stack-up issues before they arise. However, if tolerance stack-ups do become a concern, there are alternative measures we can employ to complete the job successfully.
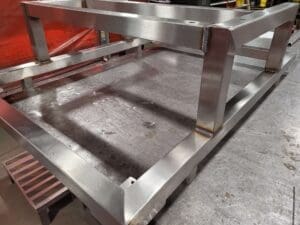
For example, for a welded enclosure with a cover, we might recommend using a PEM® floating fastener, which allows the threaded portion to “float” at 0.03” radially.
Another option is to completely form the part and then perform a secondary machining operation. While we can hold tighter tolerances using this approach, additional machine time is required, which can increase costs.
Additional Considerations
1. Material Properties and Their Impact on Tolerancing
Different materials exhibit unique characteristics that influence tolerancing. For instance:
- Thermal Expansion: Materials expand and contract with temperature changes, affecting dimensions and fit. Designers should account for the thermal expansion coefficients of materials, especially in environments with significant temperature fluctuations.
- Elasticity and Yield Strength: Materials with lower yield strength may deform more easily during fabrication, impacting the final dimensions. Understanding these properties helps in setting realistic tolerances.
2. Advanced Tolerance Analysis Methods
Beyond basic tolerance considerations, employing advanced analysis methods can predict and mitigate potential issues:
- Statistical Tolerance Analysis: This method uses statistical methods to predict the cumulative effect of individual tolerances, providing a more accurate prediction of assembly variations.
- Monte Carlo Simulations: By running simulations with random variations within specified tolerances, designers can assess the probability of assembly success and identify critical tolerance areas.
3. Best Practices for Tolerance Specification
Implementing best practices can lead to more efficient fabrication and assembly:
- Early Collaboration: Engaging engineers, quality control teams, and fabricators early in the design process ensures that tolerances are realistic and achievable, preventing unnecessary delays.
- Avoiding Over-Tolerancing: Specifying unnecessarily tight tolerances can increase manufacturing complexity and cost. It's essential to identify critical dimensions that require tight tolerances and allow more flexibility in non-critical areas.
4. Post-Fabrication Processes
In some cases, achieving the desired tolerances may require additional processing:
- Secondary Machining: After forming, secondary machining operations can refine critical dimensions, ensuring tighter tolerances where necessary. However, this adds time and cost, so it should be used judiciously.
- Use of Fixtures and Jigs: Employing custom fixtures during assembly can help control and maintain tolerances, especially in complex assemblies.
5. Continuous Improvement and Feedback Loops
Establishing a feedback loop between the fabrication team and designers can lead to continuous improvement:
- Regular Reviews: Assessing completed projects to identify tolerance issues can inform future designs, leading to better outcomes.
- Training and Development: Investing in training for both designers and fabricators ensures a shared understanding of tolerancing challenges and solutions.
If you’re looking for a team of experts to manufacture your precision sheet metal parts, let’s work together. Request a quote to get started!


