
Last updated on August 27th, 2026 at 10:58 am
At Approved Sheet Metal, we deliver excellence in sheet metal fabrication. That includes helping customers choose the best finishing method for their parts and making sure the design accounts for the finish before fabrication begins.
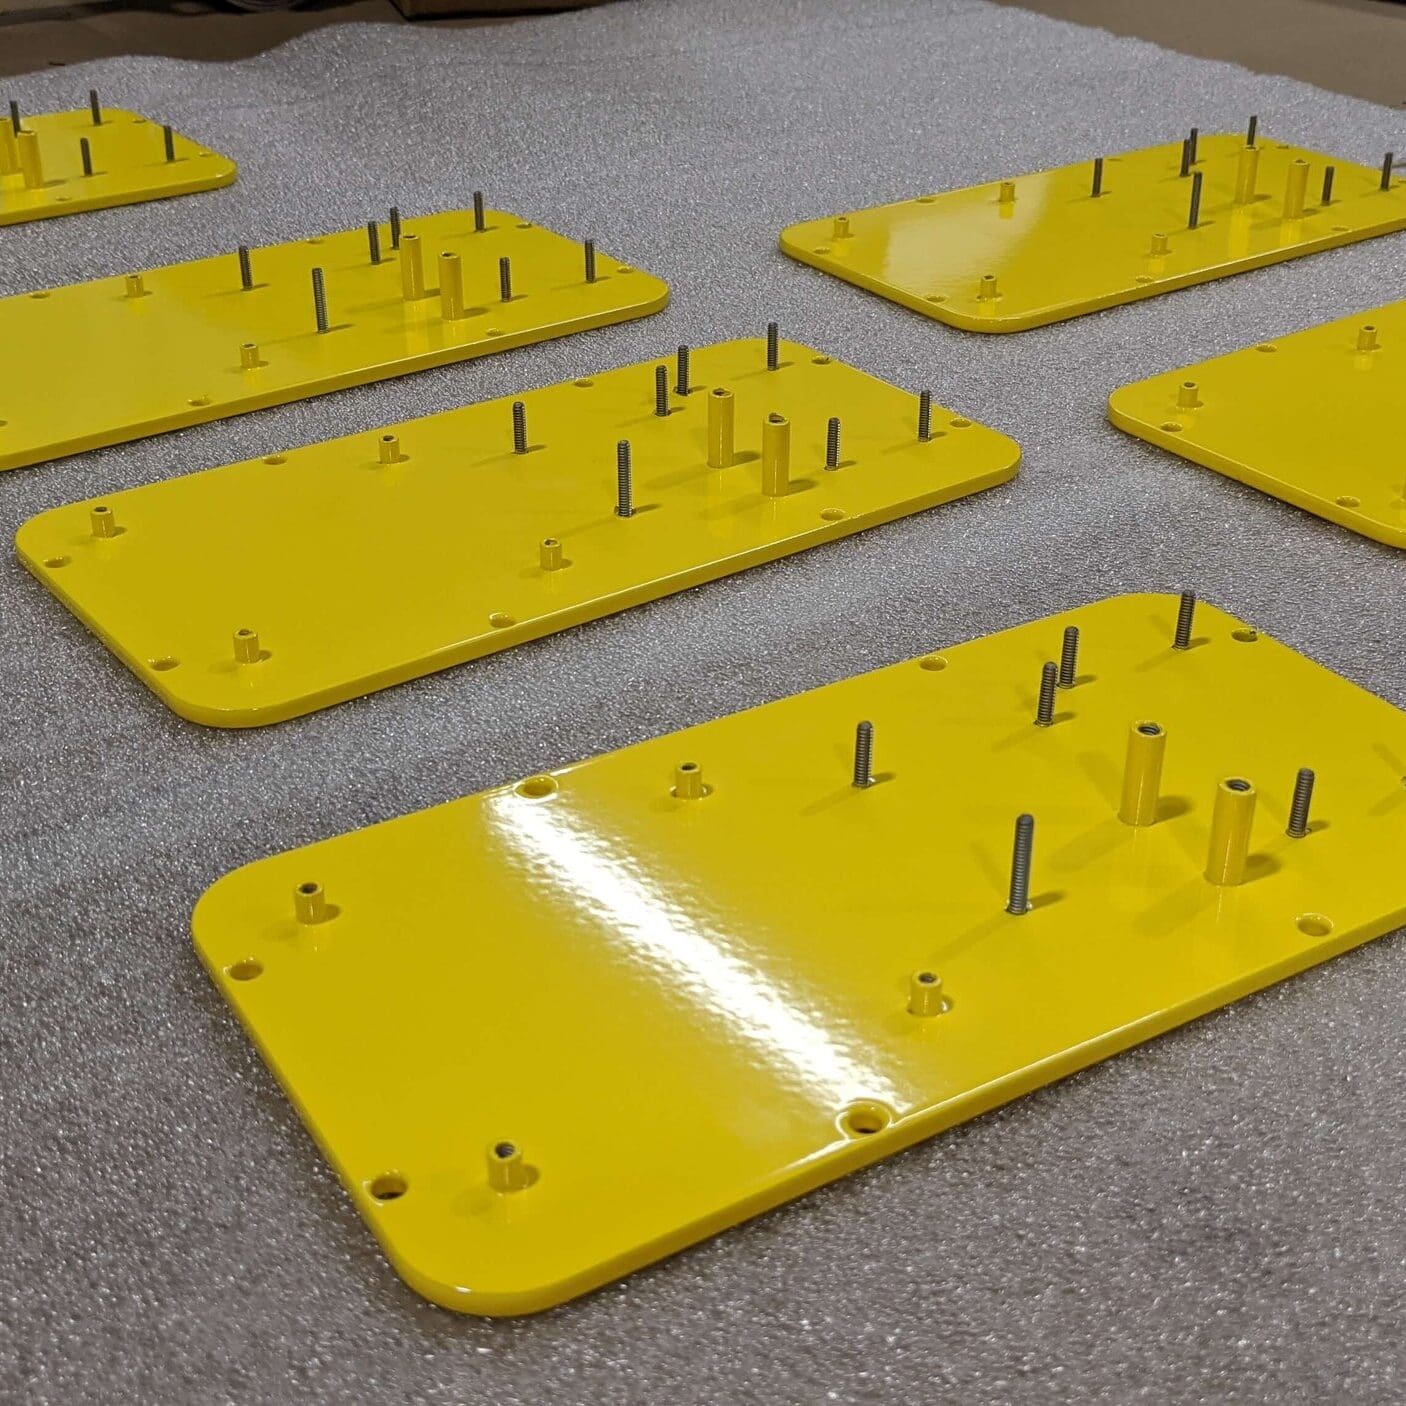
Powder coating is a durable and attractive finish for custom sheet metal parts, but it changes dimensions, affects holes and threads, requires a way to hang the part, and may require masking or special finishing instructions.
ASM powder coats aluminum, steel, and stainless steel parts for a wide range of applications. With decades of experience working with powder coated sheet metal parts, we’ve learned that a little planning before fabrication can prevent fit-up problems, unnecessary rework, and added cost later.
1. Make Sure Your Part Can “Hang”
During powder coating, parts are typically suspended from a rack so the coating can reach the required surfaces and the part can move through the coating and curing process.
That means every part needs a practical hanging point.
Existing holes
Many parts already contain holes for hardware insertion, fasteners, or assembly. When the location and geometry are suitable, those existing holes can often be used as hanging points.
New hanging holes
If the part does not already have an appropriate feature, ASM commonly recommends adding a small hanging hole in a noncritical or inconspicuous location.
A 0.125" diameter hole is a common ASM starting point for many parts, but the appropriate size and location depend on the part’s weight, geometry, finish requirements, and how it will be racked.
Any permanent hanging hole should be placed where it will not interfere with appearance, fit, sealing, assembly, or function.
Break-off tabs or clips
If a permanent hanging hole is not acceptable, another option is a temporary break-off tab with a hanging hole. The tab can be removed after coating.
Some smaller parts may also be hung using clips or other rack contact methods.
These alternatives can require touch-up or leave a small contact area where the rack or clip interacted with the part, so hanging strategy should be considered early when cosmetic appearance is important.
2. Account for Powder Coat Buildup
Powder coating adds measurable film thickness to every coated surface. That added material can affect holes, slots, mating surfaces, threads, tabs, covers, and other features with limited clearance.
The exact coating thickness depends on the powder, texture, coating specification, application process, and finishing requirements. Rather than assuming one universal thickness for every job, critical geometry should be designed around the specified finish.
For more detail, review our guide to the impact of powder coating on sheet metal tolerances.
| Feature | Powder Coat Concern | Typical Design Response |
|---|---|---|
| Clearance Hole | Coating reduces the finished diameter | Allow additional clearance or mask when required |
| Slot | Coating reduces the finished width | Account for coating on both sides |
| Threaded Hole | Powder can interfere with the threads | Mask, plug, or restore threads after coating |
| Mating Surface | Coating changes the final fit | Mask or design additional clearance |
| Grounding Point | Powder coat is electrically insulating | Mask the required metal-to-metal contact area |
| Hardware Location | Finish sequence can affect installation | Plan whether hardware is installed before or after coating |
Designs with tight hole tolerances or close-fitting components may require masking, additional clearance, or a post-coating operation to restore the required dimensions.
3. Clarify Specific Colors, Textures, and Sheens
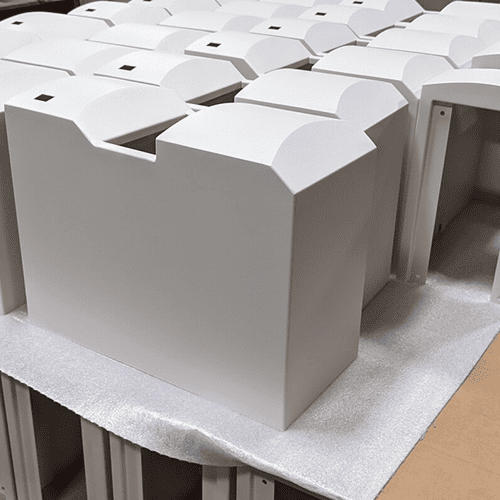
The wide variety of powder coat options is one reason the finish is so popular, but a simple callout such as “powder coat black” may not provide enough information to reproduce the exact appearance you expect.
Different powder manufacturers can produce slightly different appearances even when the nominal color is similar. Texture, gloss level, film thickness, substrate, and curing conditions can also influence the final result.
If appearance is important, specify as much of the following as possible:
- Powder manufacturer
- Product or series
- Color code
- RAL number, when applicable
- Gloss level
- Texture
- Approved physical sample, if appearance is especially critical
A RAL color alone may not fully define the finished appearance. If a specific powder was used for the prototype and color consistency matters, identify the same manufacturer and powder product for subsequent production.
Also keep availability in mind. Specialty colors, textures, or powder systems may have minimum purchase quantities or longer sourcing times that can affect cost and lead time.
Locating color information
Powder suppliers such as Cardinal Paint and Sherwin-Williams provide color resources that can help narrow down your options.
Keep in mind that colors displayed on a monitor may not match the physical powder-coated finish exactly. When appearance is critical, use a physical sample or approved color chip whenever possible.
We are also happy to send samples of our house colors for review. Complete our contact form for details!
4. Specify Pretreatment and Environmental Requirements
Pretreatment is often used before powder coating to improve coating adhesion, corrosion resistance, or long-term durability.
The appropriate pretreatment depends on the base material and the environment in which the finished part will be used. Aluminum and steel, for example, may require different preparation or conversion-coating systems.
If your drawing or customer specification requires chromate conversion, zinc-based pretreatment, phosphate treatment, or another specific process, call it out before quoting.
Powder coating itself is electrically insulating. If the part requires electrical continuity, grounding, bonding, or another metal-to-metal electrical connection, the required contact area usually needs to remain free of powder through masking or another planned finishing method.
5. Identify Surfaces That Must Remain Bare
Not every surface on a powder coated part should necessarily receive coating.
Areas that may need masking include:
- Grounding points
- Electrical contact surfaces
- Threaded holes
- External threads
- Precision locating features
- Bearing or sliding surfaces
- Tight mating surfaces
- Some gasket interfaces
- Adhesive bonding areas
- Hardware locations where coating would interfere with installation
If a surface must remain bare, identify it clearly on the drawing rather than relying on the finisher to determine which areas are functional.
Masking adds processing time, so unnecessary masking should also be avoided.
6. Plan Threads and Hardware Around the Finishing Sequence
Powder coat buildup can interfere with threaded holes, studs, inserted hardware, hinges, and other assembly features.
The best solution depends on the hardware and how the finished part will be assembled.
Mask threaded features
Internal threads can be protected using heat-resistant silicone plugs or other masking methods. External threads and specific surfaces can often be protected with high-temperature tape or suitable masking components.
If functional threads need to remain clean, identify those locations on the drawing.
Restore threads after coating when appropriate
In some cases, threads can be chased or re-tapped after powder coating. This adds labor and can disturb the coating immediately around the threaded feature, so masking is often preferable when thread quality or appearance is important.
Decide when hardware should be installed
Some hardware may be installed before coating while other sheet metal hardware is better installed afterward.
The correct sequence depends on factors such as:
- Hardware material and finish
- Whether the hardware head should be coated
- Whether threads must remain clean
- Whether hardware provides a grounding path
- Whether insertion after coating could damage the finish
- Whether the hardware manufacturer has specific installation requirements
Provide the hardware manufacturer and part number when possible so the fabrication and coating sequence can be planned around the actual component.
7. Check Assembly Fit After Powder Coating
Powder coating can change more than individual hole dimensions. It can also affect how complete sheet metal components fit together.
Pay special attention to:
- Tab-and-slot assemblies
- Removable covers
- Nested panels
- Hinges
- Sliding features
- Doors and enclosure openings
- Frame-to-panel interfaces
- Closely fitted brackets
If two coated surfaces face one another, the combined coating buildup can reduce the available clearance more than expected.
Whenever fit is critical, identify whether the drawing dimensions apply before or after finishing and make sure the final assembly is designed around the coated condition.
8. Avoid Unnecessary Multi-Color Complexity
Applying multiple powder colors to a single part is possible, but each additional masking and coating operation adds labor, handling, cure cycles, and opportunities for visible transition lines or finish variation.
For a part that needs multiple colors, graphics, labels, or branding, other options may be more practical depending on the design, including:
- Wet paint
- Silk screening
- Labels or overlays
- Engraving
- Separate powder-coated components assembled together
If multiple colors are important to the product, discuss the complete appearance requirement with your fabricator and finisher before finalizing the manufacturing approach.
What Should Be on a Powder Coat Drawing?
A clear finish specification helps your fabricator quote the part correctly and prevents assumptions during finishing.
Depending on the project, identify:
- Base material
- Powder manufacturer and product, when required
- Color code or RAL
- Gloss level
- Texture
- Pretreatment specification
- Surfaces to be masked
- Grounding or electrical contact points
- Thread-protection requirements
- Cosmetic surfaces
- Critical dimensions that apply after finishing
- Hardware installation sequence, when important
If appearance is controlled by an approved physical sample rather than a color code alone, include that requirement as well.
Why Choose Approved Sheet Metal for Powder Coated Sheet Metal Parts?
At Approved Sheet Metal, we coordinate sheet metal fabrication and powder coating as part of the complete manufacturing process. That allows finishing requirements to be considered during cutting, forming, welding, hardware installation, and assembly instead of treating powder coating as an afterthought.
Our team can review hanging points, coating buildup, masking, hardware sequence, color requirements, mating clearances, and other DFM considerations before parts reach finishing.
With robust capabilities for sheet metal finishing, we can help you plan powder coated parts that look right and assemble correctly. Request a quote!
Recommended Default Sheet Metal Tolerances
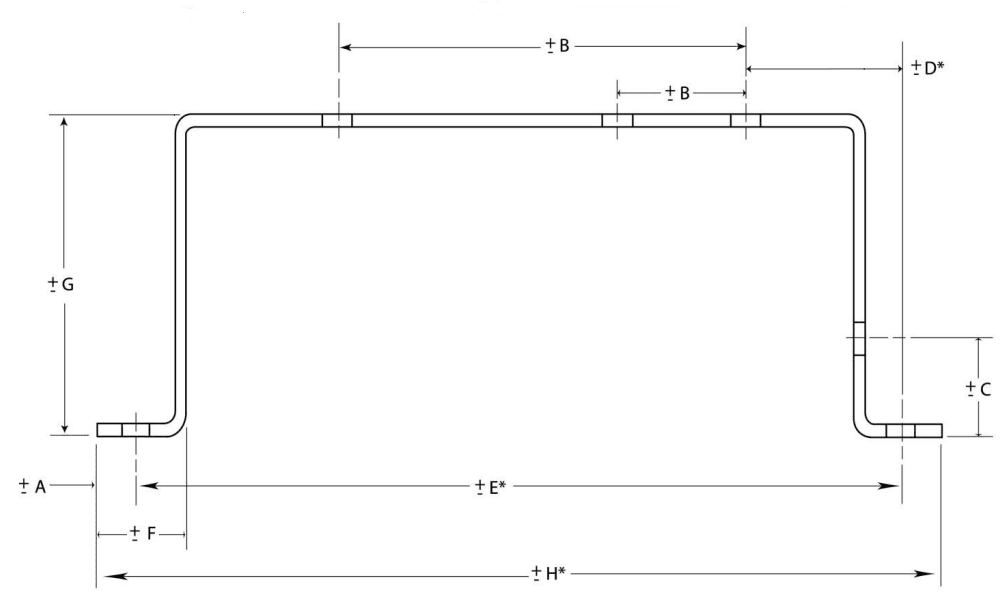
| DIM | Tolerance (MM) | Tolerance (Inches) | Description |
| A | ± 0.13 | ± 0.005 | Sheared Edge to Hole |
| B | ± 0.13 | ± 0.005 | 2 Holes on One Surface |
| C | ± 0.25 | ± 0.010 | Formed Edge to Hole |
| D* | ± 0.76 | ± 0.030 | Holes Across 2 Bends |
| E* | ± 0.76 | ± 0.030 | Holes Across 4 Bends |
| F | ± 0.25 | ± 0.010 | Sheared Edge to Bend |
| G | ± 0.38 | ± 0.015 | Across 2 Bends |
| H* | ± 0.76 | ± 0.030 | Formed Part |
Noted dimensions are to be taken while the part is in a restrained condition. Noted dimensions are for parts within a 12” envelope.
* Dimensions D, E and H are not recommended forms of dimensioning
These tolerances are recommended and best practices. We can obtain tighter tolerances (depending on part geometry/ construction), contact us for more information


